Before you install or update
Please ensure that you have required access levels to Google Ad Manager and required tools. More about requirements check here.
Installation methods
Each template has three installation methods:
- Method A: download and install template file with default settings by importing it in Google Ad Manager (easiest);
- Method B: customize appearance and default values, then download and install template file with your customizations by importing it in Google Ad Manager;
- Method C: install manually - by following instructions, create a template directly in Google Ad Manager (this method requires much more time than other methods, use this method when other methods aren't available).
Method A: download and install
- Download a custom creative template from your purchase/downloads page. That file will be a zip file which contains a template file and instructions file. Extract the zip bundle on your computer. Locate a template file with ".dfp-template" extension (some templates have two files with ".dfp-template" extension - one for use in ad-units with defined size and another (with "_outofpage" suffix) for out-of-page ad-units).
- Sign In to your Google Ad Manager account.
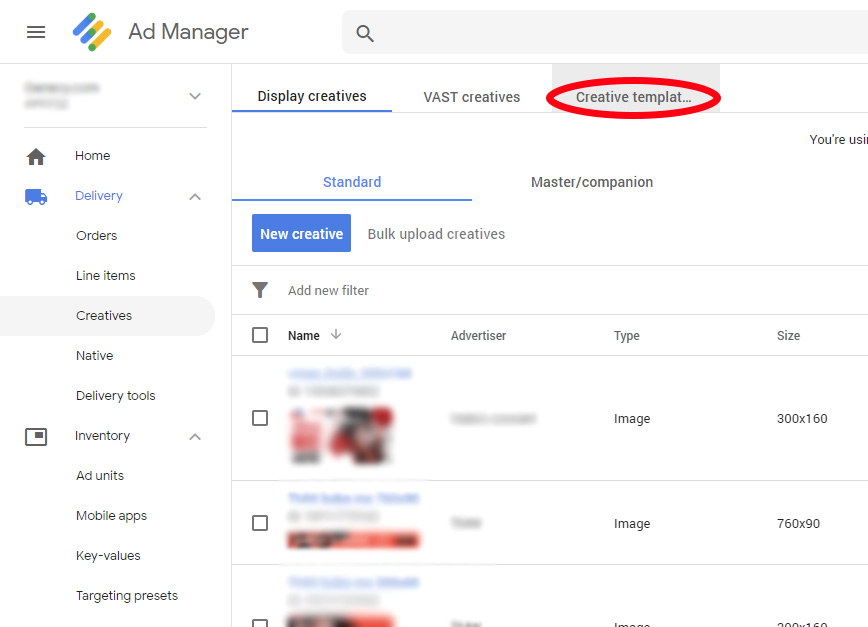
- Click on Delivery > Creatives on the left side menu.
- Click on the Creative templates tab.
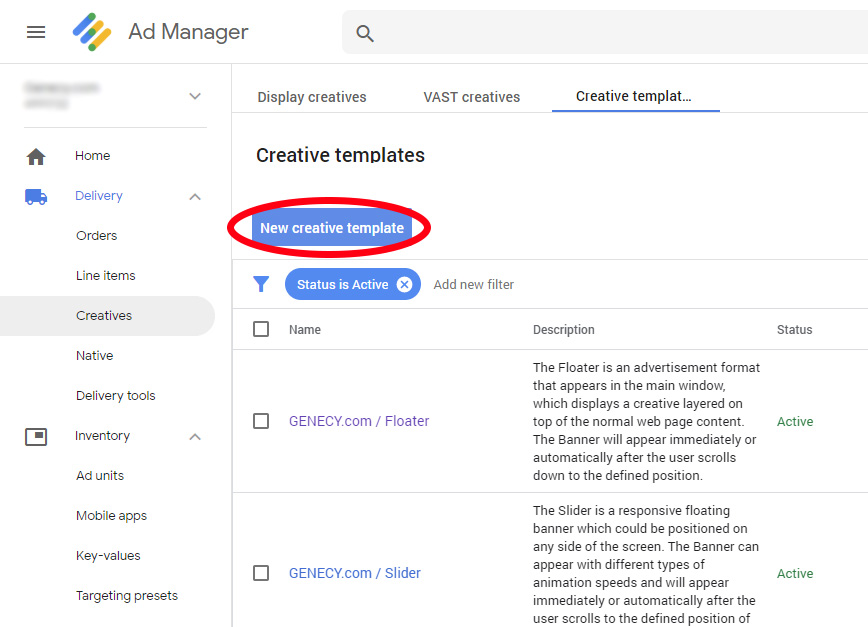
- Click the New creative template button if you want to install the new template or select one of the installed templates to make an update.
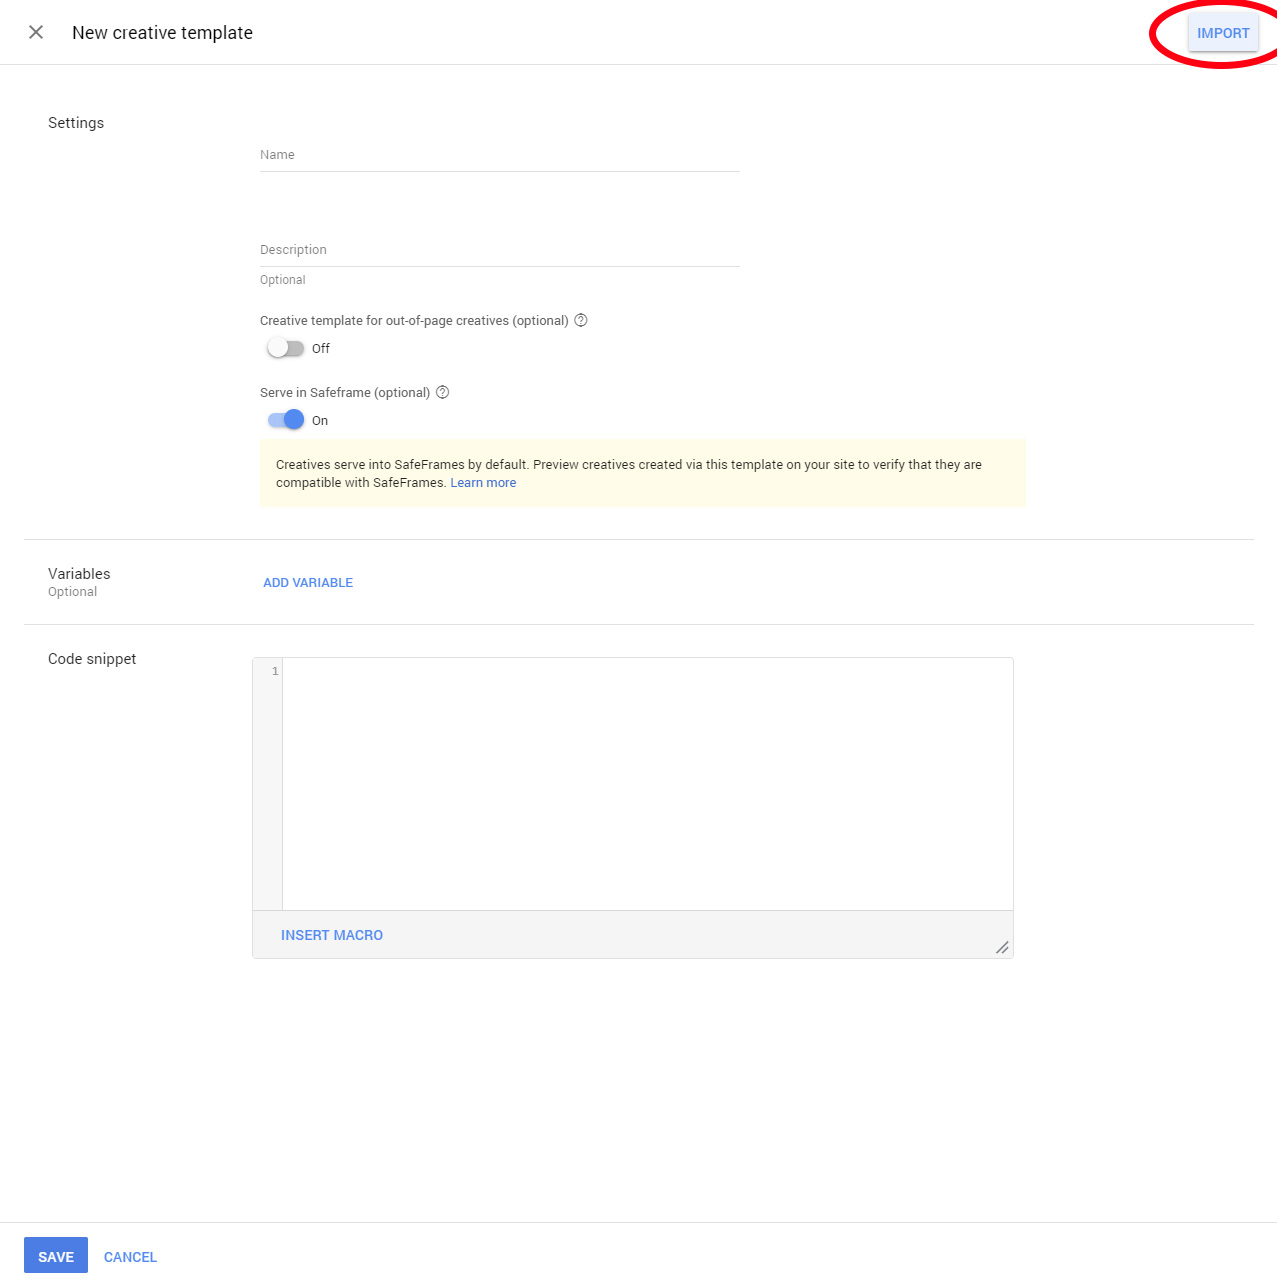
- Click on the IMPORT button.
- Browse for a creative template file (with ".dfp-template" extension) you extracted in step 1. Click SUBMIT button.
Meaning of template file suffixes:
- "" (no suffix) – default; for using with size-defined ad-units (for instance, 1x1, 300x250, etc.);
- "_outofpage" – for using with out-of-page ad-units;
- "_multiple" – for Wallpaper only, version for using with multiple source files; for using with size-defined ad-units;
- "_multiple_outofpage" - for Wallpaper only, version for using with multiple source files; for using with out-of-page ad-units.
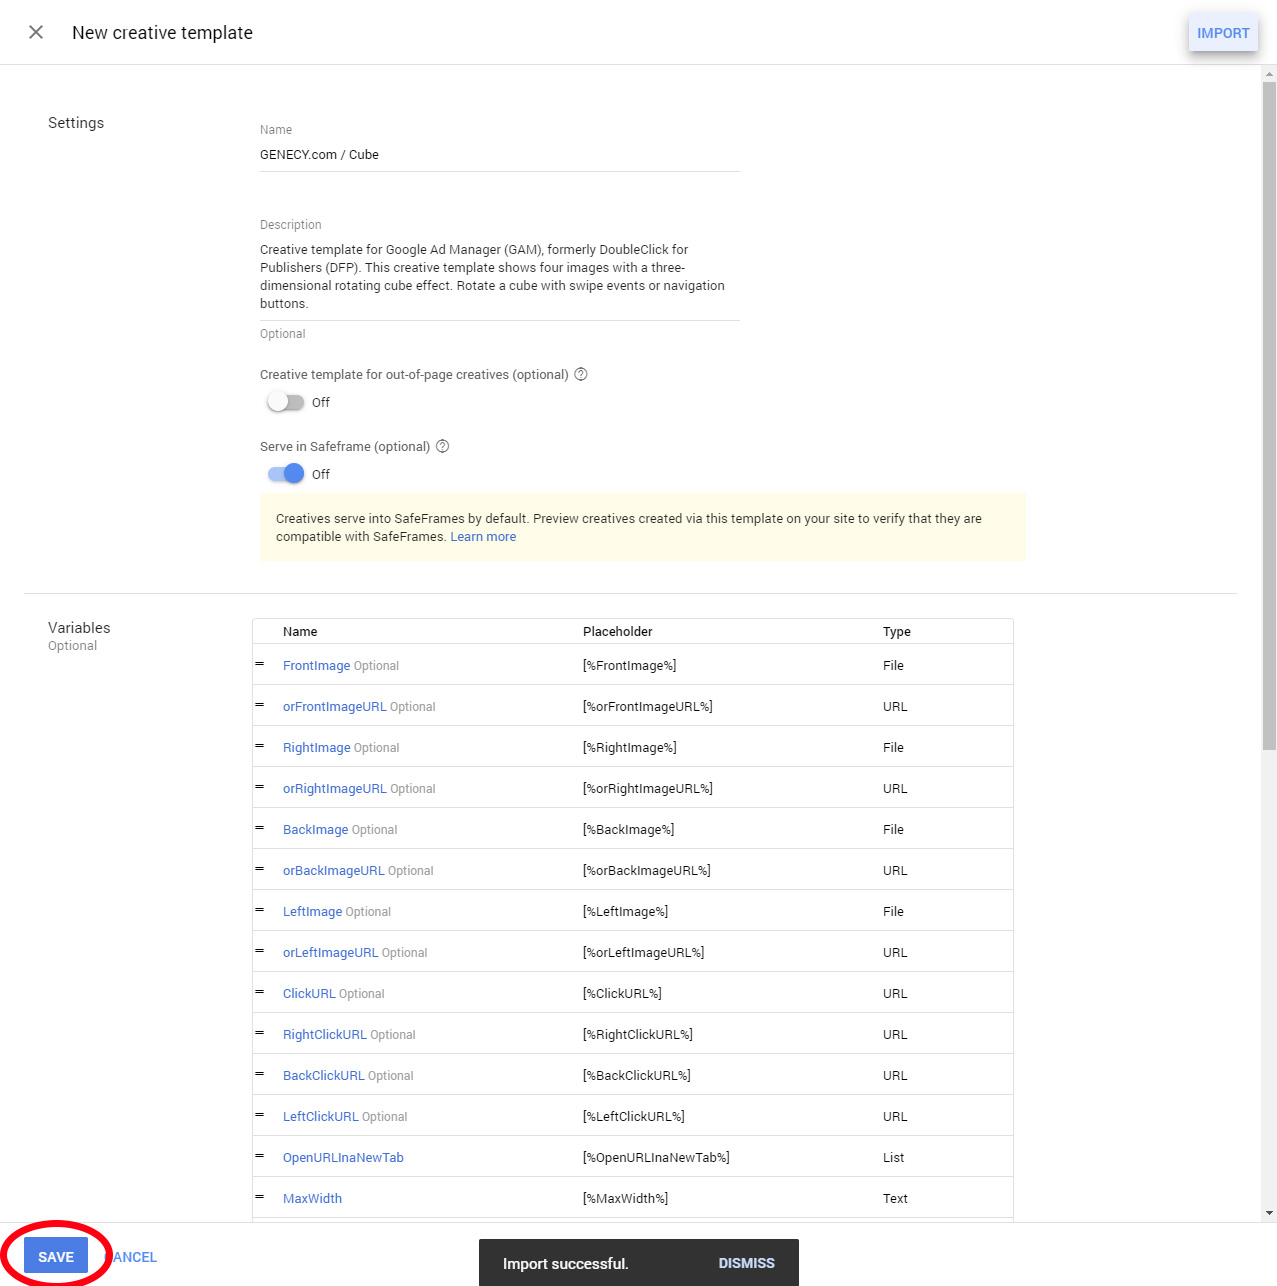
- "Import successful" message will appear shortly.
Don't make any changes if you aren't sure what you are doing. Any changes may break a template. If you need to change something, use the customization method or follow instructions here to change default values.
- Click SAVE button. A confirmation message and list of templates appear if everything was okay.
Method B: customize, download and install
- Open a customization page of a creative template from your purchase/downloads page.
- Make desired customizations and download a customized custom creative template.
- Follow steps described in installation method A.
Method C: install manually
- From your purchase/downloads page click on the Manual installation button for appropriate template.
- Follow instructions described in that page.