Creating HTML banners with exit events in Google Web Designer is relatively simple, and you can easily upload them to Google Ad Manager as HTML5 creatives by following the official instructions. Google searches for exit events during the upload process, and if successful, it accepts the HTML banner. However, HTML banners with exit events don’t work with custom creative templates because Google doesn’t allow uploading HTML banners in creative templates. As a result, you need to use a different approach for click tracking.
In this article, we will demonstrate how to create HTML banners with clickTAG variables. By the end, you’ll be able to create an HTML banner that retrieves a click-through URL from the banner URL.
For example, the URL https://domain/path/to/banner/index.html?clickTAG=https://www.genecy.com/dfp/ has the following parts:
| https://domain/path/to/banner/index.html | the URL to the hosted banner |
| clickTAG | the clickTAG parameter |
| https://www.genecy.com/ | the landing page URL |
1. Open a Banner in Google Web Designer
We assume you have basic knowledge of Google Web Designer (GWD) and have already created a banner. Open the banner in GWD. If you haven’t created one yet, create it without implementing a click-through URL.
2.Add a clickTAG with Default Landing Page URL
a) Create a tap area from Google Web Designer components (if you don’t see the “Components” panel, click Window > Components).
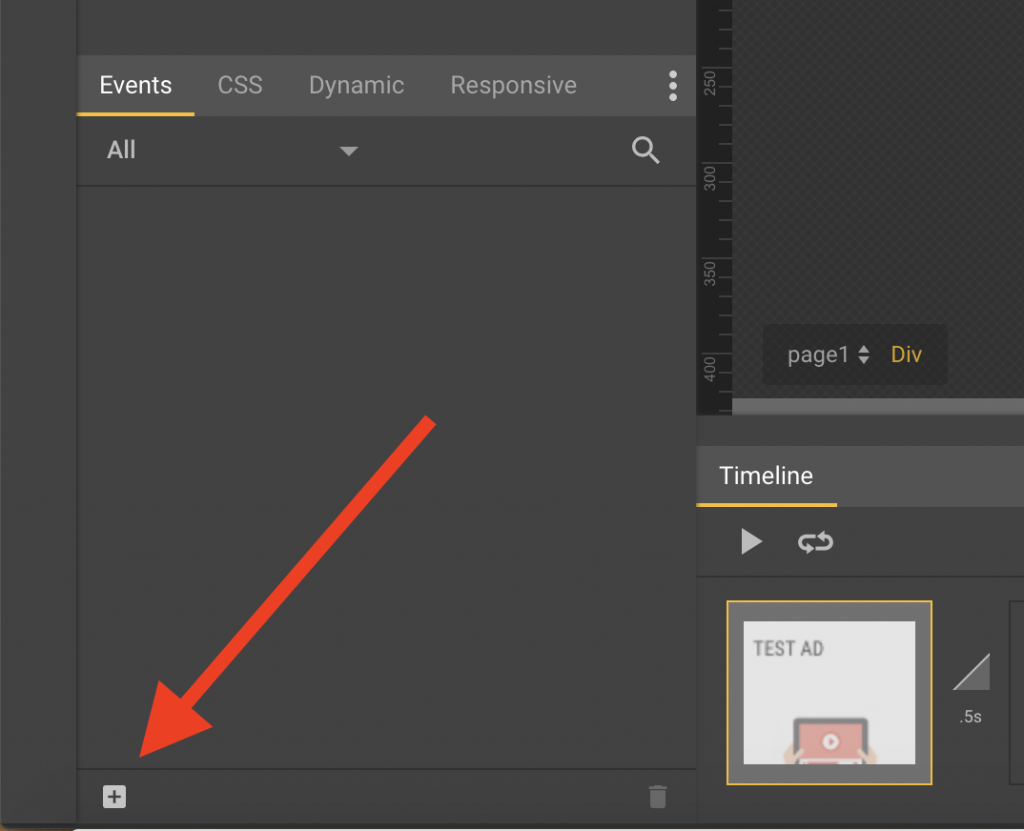
b) Right-click on the tap area and select “Add event…”. Alternatively, click on the “+” button in the “Events” panel (if you don’t see the “Events” panel, click Window > Events).
c) Select the previously added tap area as the target (skip this step if you selected “Add event…” from the right-click menu).

d) Choose “Tap Area” and then “Touch/Click”.

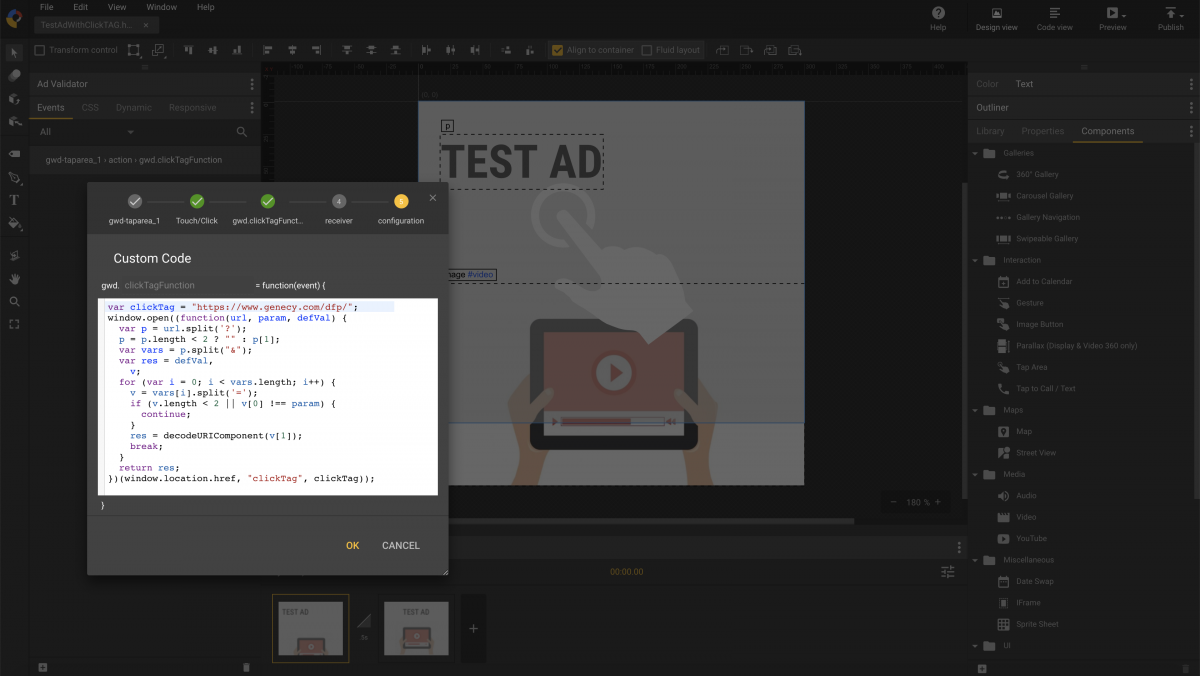
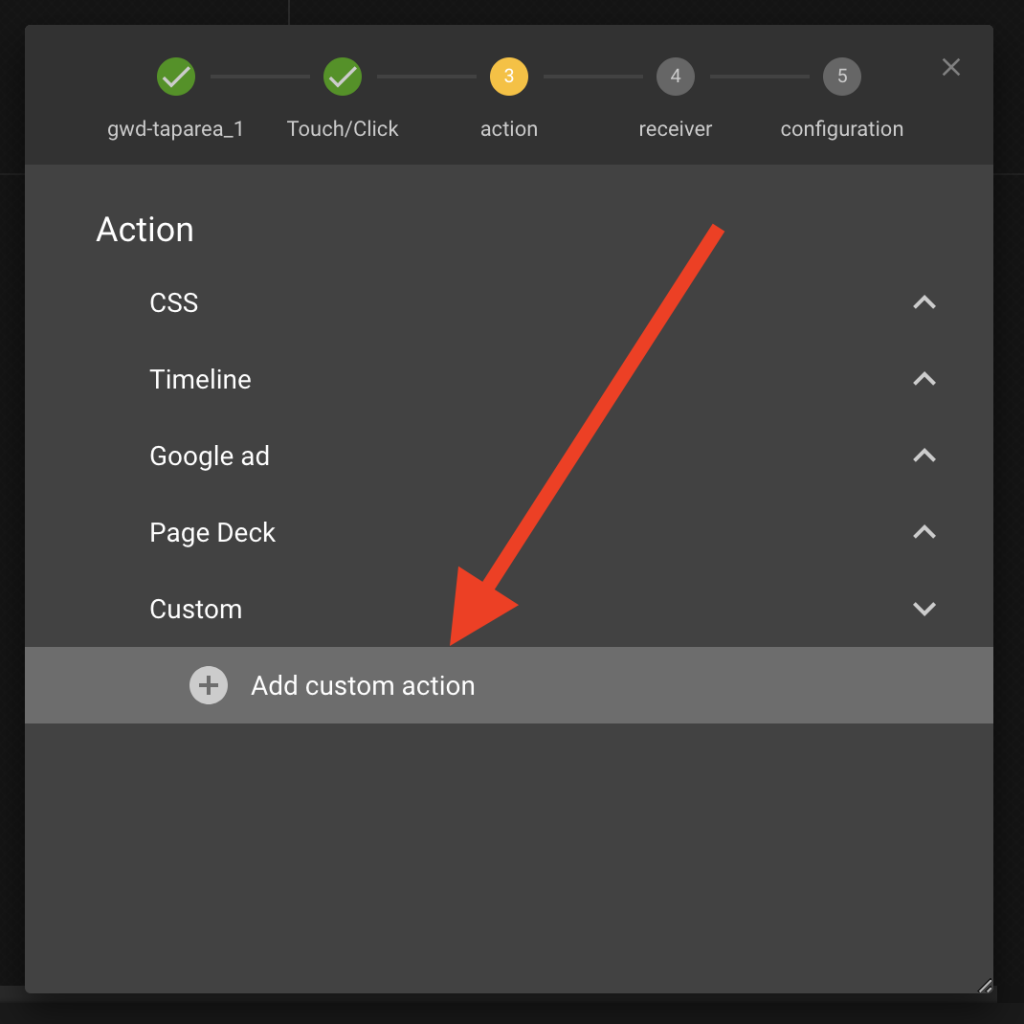
e) Select “Custom” and then “Add custom action”.
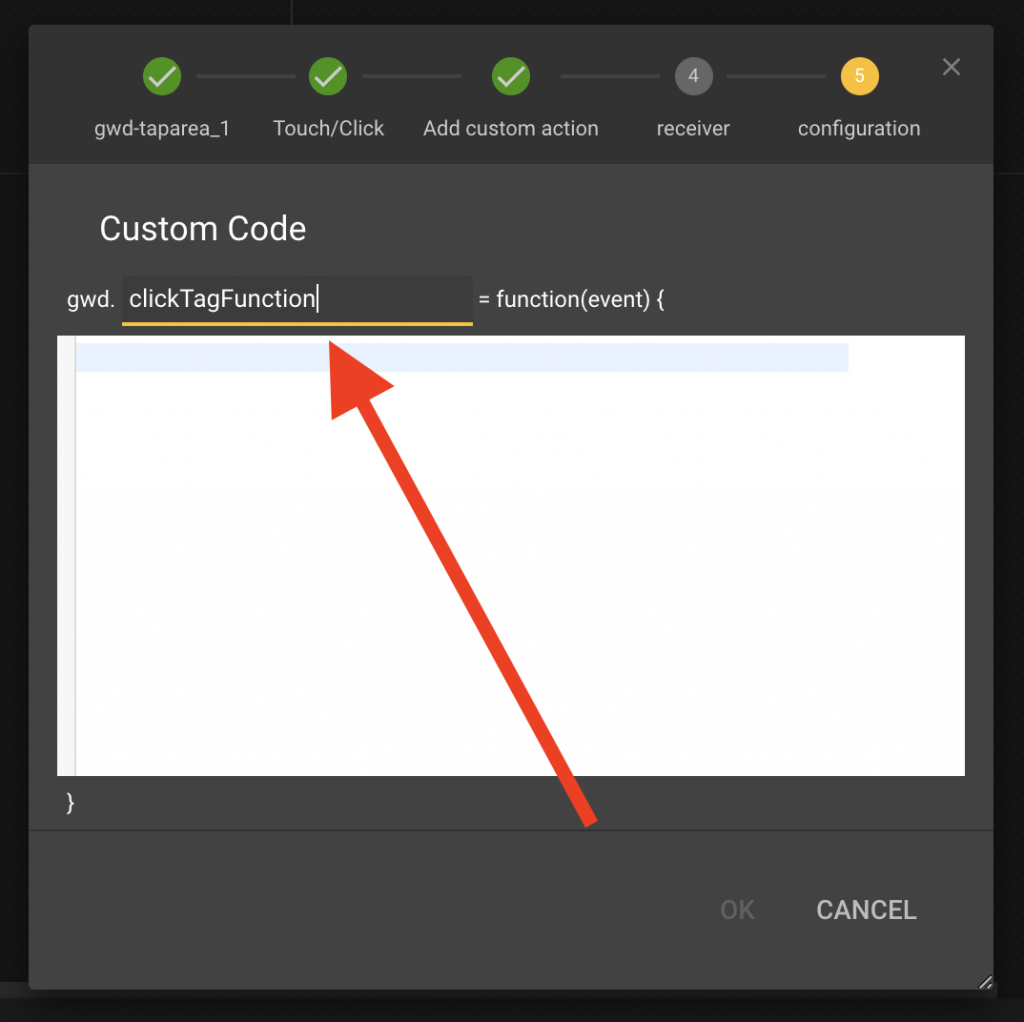
f) Define the function name (located right after “gwd.”), for example, “clickTagFunction”.
g) Add this code snippet:
var clickTag = "https://www.genecy.com/";
window.open((function(url, param, defVal) {
  var p = url.split('?');
  p = p.length < 2 ? "" : p[1];
  var vars = p.split("&");
  var res = defVal, v;
  for (var i = 0; i < vars.length; i++) {
    v = vars[i].split('=');
    if (v.length < 2 || v[0] !== param) {
    	continue;
    }
    res = decodeURIComponent(v[1]);
    break;
  }
  return res;
})(window.location.href, "clickTag", clickTag));
The first line defines the default landing page URL, which will be used when no clickTAG variables are passed to the URL.
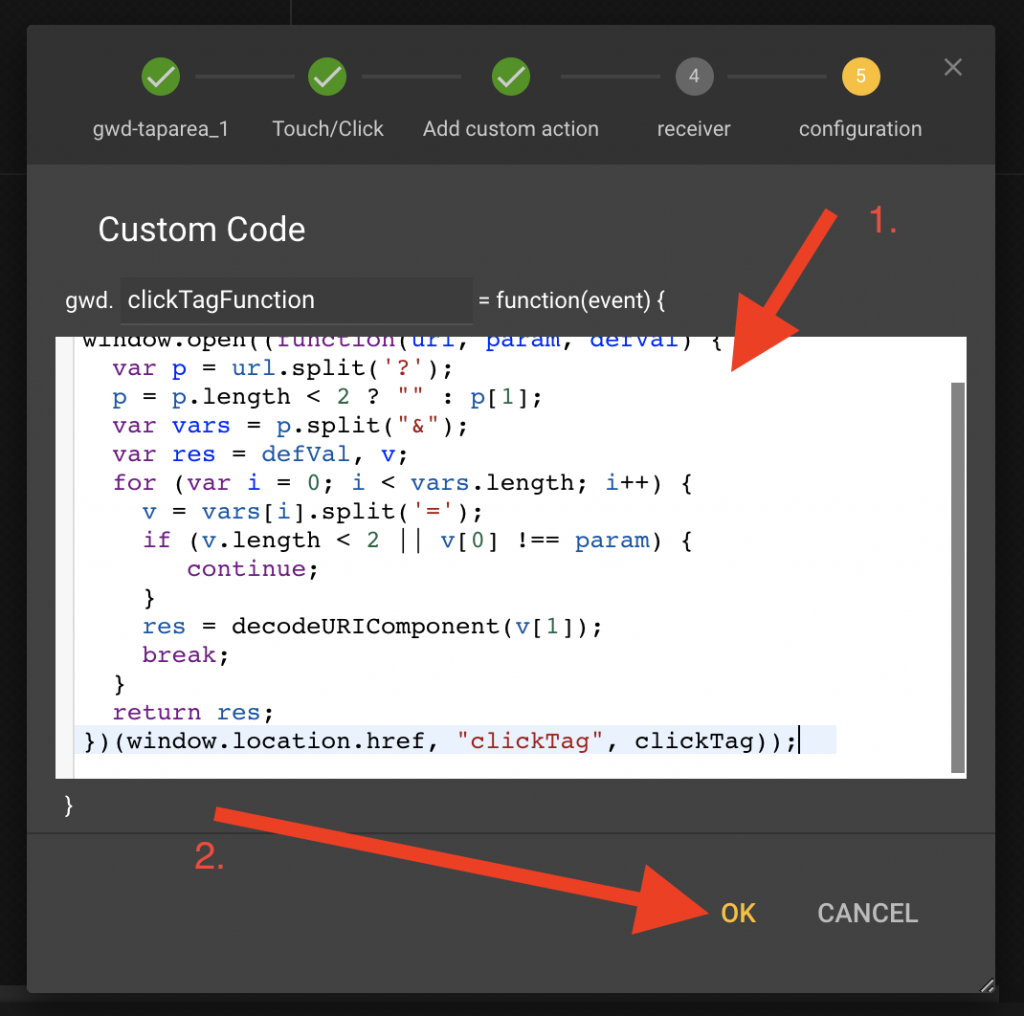
Note: JavaScript variables are case-sensitive, so the clickTAG parameter in a URL should match the case in the code snippet. The clickTAG parameter’s name is provided in the code snippet’s last line between double quotes. You can change it as needed.
Encoding URLs
We highly recommend encoding the click-through URL before appending it to the clickTAG parameter. In cases where landing URLs have characters like “?” and “&”, these URLs can be misinterpreted.
For example, the unencoded landing page URL “https://link.to/landing/page/index.php?cat=abc&page=1” will be parsed as “https://link.to/landing/page/index.php”. The converted URL will look like this: https%3A%2F%2Flink.to%2Flanding%2Fpage%2Findex.php%3Fcat%3Dabc%26page%3D1. Search in Google for online URL encoders.
In conclusion
You can also use this approach if you need an HTML banner with clickTAG for other ad servers.